

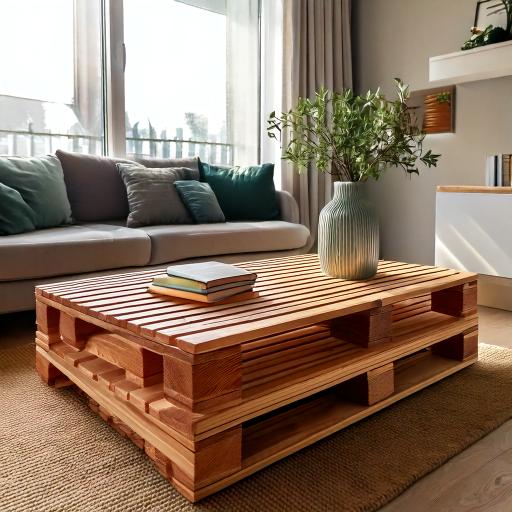
DIY Pallet Coffee Table: Transform Old Wood into a Stylish Centerpiece
A pallet coffee table is the perfect blend of rustic charm and modern utility, making it a sought-after DIY project for home décor enthusiasts. This guide walks you through creating your very own pallet coffee table from start to finish. It’s cost-effective, sustainable, and adds a personal touch to your living room.
Why Choose a Pallet Coffee Table?
Reclaimed pallets are an eco-friendly way to create furniture, giving old wood a second life. A pallet coffee table is versatile, easy to customize, and pairs well with a variety of interior design styles. Whether you’re going for industrial chic or cozy farmhouse, this project has you covered.
Materials You’ll Need
Before starting, gather the following materials:
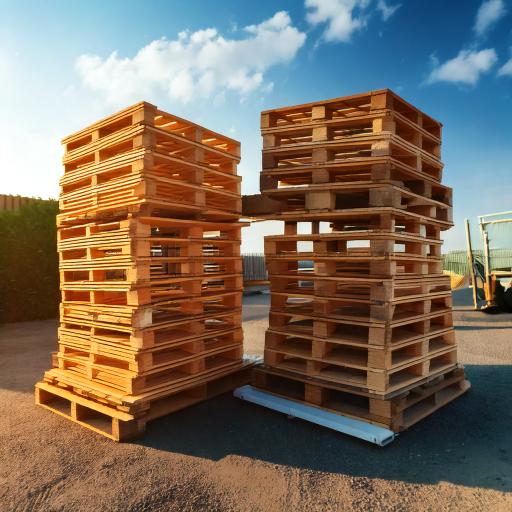
- 1 or 2 wooden pallets (depending on your desired size)
- Sandpaper (medium and fine grit)
- Wood stain or paint (optional)
- Wood screws or nails
- Power drill or hammer
- Wood glue
- 4 caster wheels (optional, for mobility)
- A glass top (optional, for a sleek finish)
- A measuring tape and pencil
Pro Tip: Ensure your pallet is free of mold, pests, or toxic treatments. Look for the “HT” (heat-treated) stamp for safety.
Step 1: Preparing the Pallets
- Clean the Wood: Wash the pallets with soap and water to remove dirt and grime. Let them dry completely.
- Sand the Surface: Use medium-grit sandpaper to remove splinters and rough spots. Follow up with fine-grit sandpaper for a smooth finish.
- Inspect the Pallets: Check for loose nails or damaged planks and make necessary repairs.
Step 2: Design and Assembly
- Decide on the Size: One pallet can work as a simple table, but stacking two pallets adds height and storage space.
- Attach the Pallets: If stacking, align the pallets and secure them together with wood screws or nails. Apply wood glue between the layers for added stability.
- Fill the Gaps (Optional): If you prefer a solid surface, add extra planks to fill in gaps between the pallet slats.
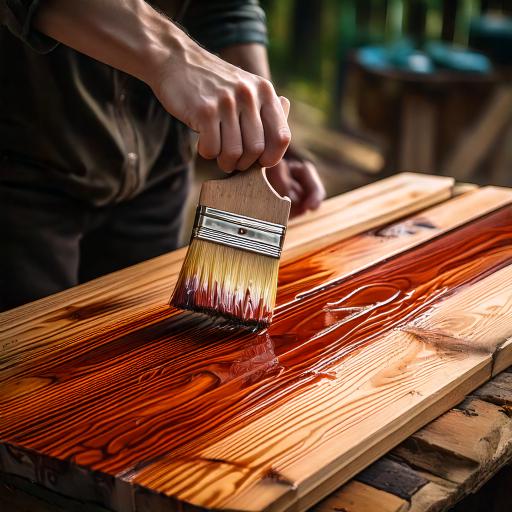
Step 3: Sanding and Finishing
- Fine-Tune the Edges: Sand all edges and corners to make the table safe for use.
- Apply Stain or Paint: Choose a wood stain for a natural look or paint for a bold statement. Apply two coats, allowing drying time between each.
- Seal the Surface: Use a clear sealant to protect your table from spills and scratches.
Step 4: Adding Wheels or a Glass Top
- Attach Caster Wheels (Optional): Flip the table over and screw a wheel into each corner for mobility.
- Install a Glass Top (Optional): Place a custom-cut glass top over the pallet for a polished look and easy cleaning.
Step 5: Styling Your Coffee Table
Now that your pallet coffee table is complete, it’s time to style it! Add a cozy vibe with:
- A decorative tray
- Books or magazines
- A potted plant or flowers
- Candles or small sculptures
Why You’ll Love This DIY Project
This pallet coffee table is not just a piece of furniture; it’s a conversation starter. You’ll feel a sense of accomplishment every time you see it, knowing you created something both beautiful and functional. Plus, it’s a great way to practice sustainable living by reusing materials.
")

")


")
